Replaced the shower faucet cartridge in the boys’ bathroom with a Moen 1200 cartridge. No photo. The squeal is gone!
Showing posts with label Guest Bathroom. Show all posts
Showing posts with label Guest Bathroom. Show all posts
Tuesday, June 16, 2026

Sunday, May 3, 2015
New Toilet Paper Holders
This one has been on my list for so long I forgot about it. Brianna reminded me this weekend, because she was tired of seeing the new dispensers sitting in their boxes in the bathrooms.
The old dispensers were pretty grody, and we didn't remove them before painting the house.

Now we have nice new ones, which match the silver/satin nickel theme we've been updating to all over the house.

After removing the old ones, I touched up the paint and cut out a little more drywall to fit these larger dispensers.


The old dispensers were pretty grody, and we didn't remove them before painting the house.
Now we have nice new ones, which match the silver/satin nickel theme we've been updating to all over the house.
After removing the old ones, I touched up the paint and cut out a little more drywall to fit these larger dispensers.
(heh, you can see the new one in its box in the corner. It had been there long enough to collect a good layer of dust)
Sunday, January 25, 2015


Tuesday, July 8, 2014
Upstairs Bathroom
I peeled of a lot of tape yesterday evening, and continued working on painting and hanging doors - only one and half doors left to paint!
Also, the upstairs bathroom is pretty much done! The edges could use a little touch-up, though, which might be a problem - if I remember correctly, the paint cans were pretty much empty for both of the ceiling and the wall colors.

...of course, now that I think about it, the window sill in this room still needs to be painted, and I still really hate that grody old shower curtain rod...
 |
| Not sure why the colors turned out so weird on this photo - the door is all solid white. |
...of course, now that I think about it, the window sill in this room still needs to be painted, and I still really hate that grody old shower curtain rod...
 |
| Old picture, from back when I first primed this bathroom. |
Sunday, July 6, 2014
Weekend Post-Mortem
Well, this weekend certainly didn't go according to plan.
I did manage to get most of the Great Room prepped for painting. However, the windows still need to be taped off, and I need to put plastic down over the carpet.
I did get some more blinds hung up:

Getting those three blinds on the right to hang up next to each other was tricky - they're designed to be hung independently with 2 anchors apiece. I used 4 anchors total to get the blinds nice and close to each other.
Throughout the weekend, I also managed to paint all the doors and trim upstairs (well, except for the trim in the Master Bedroom, which is still sitting in the garage):


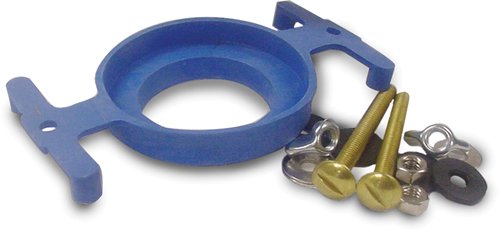
I spent way too much time on the toilet in the main floor bathroom. Turns out it requires a custom seal - the universal version I bought at Home Depot just doesn't work.

I did manage to get most of the Great Room prepped for painting. However, the windows still need to be taped off, and I need to put plastic down over the carpet.
I did get some more blinds hung up:
Getting those three blinds on the right to hang up next to each other was tricky - they're designed to be hung independently with 2 anchors apiece. I used 4 anchors total to get the blinds nice and close to each other.
Throughout the weekend, I also managed to paint all the doors and trim upstairs (well, except for the trim in the Master Bedroom, which is still sitting in the garage):
I spent way too much time on the toilet in the main floor bathroom. Turns out it requires a custom seal - the universal version I bought at Home Depot just doesn't work.
Anyway, that's more or less the work I did this weekend. I spent a significant part of Saturday just vegging out in the cool basement. I have pretty mixed feelings about that - I really wanted to get the painting done this holiday weekend, but I hit a wall Saturday morning and needed a break. On balance, I'm pleased to have had the opportunity to recharge after hitting my limits.
Wednesday, June 25, 2014
Checklist Update
I have a grand plan to start painting the Great Room this Fourth of July weekend. Last time I announced my schedule plans here, it didn't work out so well, but let's hope this time is different.
As part of prepping for painting, I rethought the checklists I used upstairs, and updated them:


All three rooms pretty much done with painting. The biggest hurdle remaining is lighting. I picked up an IKEA Sol lamp for $10 a while ago for the nursery. I'm going to have to go up into the attic again and do some wiring in order to install it properly. Not really looking forward to that task :-/

As part of prepping for painting, I rethought the checklists I used upstairs, and updated them:
All three rooms pretty much done with painting. The biggest hurdle remaining is lighting. I picked up an IKEA Sol lamp for $10 a while ago for the nursery. I'm going to have to go up into the attic again and do some wiring in order to install it properly. Not really looking forward to that task :-/

Monday, May 5, 2014
Decoration in the Upstairs Bathroom

Two mirrors at a 90 degree angle are weird.
That quilt is a wedding present from my wife's brother's wife's mother. Thanks Connie!
Saturday, May 3, 2014
Bathroom (Mostly) Done
Phew, these last details take forever. At least the painting is done.
Pretty sure the bathroom is usable now. Or at least it will be once the caulking dries. But I still need to do the trim, paint the door, touch up the paint some more (and probably the caulking, too) and do something with that windowsill. Oh, yeah, I also need to put up a curtain or blinds over the window, hang a towel rack, replace the foam toilet seat, and put some sort of decoration on the grey expanse of wall that's not in this picture. It's like I haven't done anything yet! (It's 10 PM and I'm frustrated with this bathroom).

Pretty sure the bathroom is usable now. Or at least it will be once the caulking dries. But I still need to do the trim, paint the door, touch up the paint some more (and probably the caulking, too) and do something with that windowsill. Oh, yeah, I also need to put up a curtain or blinds over the window, hang a towel rack, replace the foam toilet seat, and put some sort of decoration on the grey expanse of wall that's not in this picture. It's like I haven't done anything yet! (It's 10 PM and I'm frustrated with this bathroom).
Thursday, May 1, 2014
Bathroom Wall Color
That grey is actually quite a bit darker than I thought. On the other hand, right now there is only one 60-watt-equivalent bulb in the room, and when the bathroom is put back together there will be 240 watts of light bulbs.

The chamfered corner that is taped-off and still white is going to be green, after I put a second coat of grey on the rest of the walls.
I also finished priming the closet doors. Hopefully I can get some color on them and hang them this weekend.
The chamfered corner that is taped-off and still white is going to be green, after I put a second coat of grey on the rest of the walls.
I also finished priming the closet doors. Hopefully I can get some color on them and hang them this weekend.
Wednesday, April 30, 2014
Finishing Up the Bathroom Ceiling
I didn't think I had enough paint left to wash out the roller last night and load it up later today (and it turns out I was right) so I stuck the roller into a plastic bag and wrapped it up tight last night.
This morning I got up 30 minutes early and put up the second coat of color paint on the ceiling. I had to scrape out the bucket to finish, but it's done!
This morning I got up 30 minutes early and put up the second coat of color paint on the ceiling. I had to scrape out the bucket to finish, but it's done!
Tuesday, April 29, 2014
More More Painting
Brianna and I both stayed a bit longer at work today, as well as hitting the gym, so there wasn't time to get two coats of paint on anything tonight.
I taped off the bathroom and put a coat of water-proof color paint on the ceiling. The gallon of that paint is almost done - getting another full coat out of that bucket is going to be a stretch :-/
Man, that shower curtain rod is looking uglier the longer I look at it. The bathroom is progressing though:
After the bathroom, I meant to put some color on the closet doors I primed yesterday. However, I was careless and put primer in my paint tray instead of color paint. So I moved on to the next two closet doors and put primer on one side of each of them.
Thursday, March 27, 2014
Groupon cleaning before/after
Here are some before pictures of the bathtub- gross!


Clean but the gaps makes it look dark... I have a tool from HomeDepot that was very helpful to get the first layer of caulking off but had to use a box cutter to get the older stuff off.
Next up figuring out how to do a perfect bead. YouTube here I come!
Subscribe to:
Posts (Atom)