Showing posts with label Electrical. Show all posts

Monday, June 20, 2022

Charging Area for Robots and Laptops

We have one of those desk nooks in our kitchen. We've never been really sure what to do with the space. But recently I installed a new electrical outlet in the foot-space, and now we have a charging barn for our robot vacuum and robot mop, and charging cables in the drawer below the counter, to keep our family laptops in a known location that's also unlikely to be swept to the floor by accident.


Since the robots are pushed foward and easy to access, I think I might install some sort of shelf above robots and below the drawer - might make a good spot to store our instantpot or something similar...

Monday, April 25, 2022

Switching to a Heat Pump Clothes Dryer

As part of our on-going electrification efforts, we replaced our natural-gas powered clothes dryer with an electrically powered heat-pump clothes dryer. This also entailed the final bit of new flooring installation, as I only wanted to move these appliances once.

First up was removing the washer and dryer, and removing and capping-off the natural gas line that went to the dryer:


That was followed by removing the old linoleum and plywood:

Then came laying down the last bit of LVP and patching the vent hole:

Here's what happened on the outside of the house:


And here's the final product:


We gave away the old natural gas dryer, so it can give more years of service rather than taking up space in a landfill.

The dryer is a Whirlpool WHD560CHW ventless heat pump clothes dryer, with a 7.4 cubic foot capacity, which pretty much matches the capacity of our washer and previous dryer. So far it does seem to take about 25% longer to dry, but I don't think I would have noticed if I hadn't been timing things.

Now we just have to replace our natural gas water heater with an electric model, and we will be able to have our natural gas meter disconnected!

Monday, October 18, 2021

Geothemal - Electrical

Well, my electrician fell down while hiking and broke his collar bone two days before he was due to come out an do the final electrical installation on our heat pump.

Amazingly, he was amazing enough to drive over anyway (with a broken collar bone! on his way to the doctor!!) and walk me through what needed to be done. I then proceeded to do it.

I added a new 2" conduit for the cables for the heat pump and the emergency resistive heater:


And each circuit (60 amps) has a disconnect point anchored to the wall:


Speaking of the emergency resistive heat, here's what the heater looks like:


It's so tiny compared to the whole heat pump!

I spent around $400 on materials, mostly on the wire. And it passed inspection and has been working great! I'm so happy we didn't spend the $14,000 on upgrading the electrical grid connection.

(Oh: the electrician tried to refuse payment since he "didn't install anything", but I was able to give him something for his trouble. Happy to recommend someone with that much work ethic!)

Friday, August 27, 2021

Geothermal - Update on Electrical and the Emporia Energy Monitor

We finally heard back from our electric utility about upgrading our grid-tie connection. Months ago, they assured me it would be around $1,000, with a 4 week lead time.

They now want $8,000, with no firm time frame.

And that's not counting roughly $6,000 our electrician estimated for a new meter and upgraded electrical panel.

...

I'm not f---ing doing it.


I've been going over the form the National Electric Code issues for load-sizing a house. You do get some derates by assuming you don't actually have every single light on in the house at the same time, but even that assumes you have inefficient incandescent bulbs (we're fully LED now) and also assumes you have everything else on at once: the electric oven, the heat pump, the backup electric resistive heater, the car chargers we threw in there when we were thinking we would have 400 amps of capacity to play with...

It turns out, as long as we don't run the electric resistive heat and the oven at the same time, we fit in our 150 amp budget. Or if we turn off the car chargers (which we don't even have yet), we can run the oven and the resistive heat together. If any one of those three things doesn't run, we can have everything else in the house sucking down as much power as possible, and still fit in the 150 amp budget. 

Why don't they tell people that kind of thing? We could have had the heat pump electrical done on the same day as the rest of the install if we had known that.

Ugh.

So how do I automate this so I don't accidentally trip my main circuit breaker in the future, when we have fully electrified the house and have two electric cars?


There's a company selling a "smart" circuit breaker panel called Span, which seems to be exactly what I want. It can turn loads on and off at the circuit breaker level to keep the total load under a set threshold. I sent them a request for quote, but haven't heard anything back in 8 weeks now.

In the mean time, I've been using an Emporia Vue energy meter for about a year now. It clamps on to the main cables from the grid and up to16 individual circuits inside the panel, reporting through wifi to a smartphone app.


And Emporia has come out with an EV charger that can adjust to keep peak load below a set threshold, and they're saying they are working on individual smart circuit breakers, thermostats, and "smart appliances" (which I hope means electric water heaters).

If Emporia is for real, I might be able to completely solve this problem for a few hundred dollars, rather than fourteen thousand dollars.

In the meantime, we are now on the electrian's schedule to get final wiring in place, followed by final inspection by the city. Hopefully we'll have this project buttoned up soon.

Sunday, January 10, 2021

Going Geothermal

The furnace in our house is 28 years old (original to the house), and it is, frankly, on its last legs. Rather then trying to coax it through a few more years and risk it dying on the coldest day of winter, we are going to take advantage of the current federal tax credit and install a geothermal heat pump (also called a ground-source heat pump).

The great thing about heat pump is they can operate in reverse: heating in the winter, and cooling in the summer, with no additional equipment required. Our house will finally have Central AC!

(Source: https://www.epa.gov/rhc/geothermal-heating-and-cooling-technologies)

We spent a lot of time researching and looking for qualified installers. Given the limited space on our lot, we're going to have to go with vertical ground-loops (the other option being long trenches of horizontal ground-loops), but hopefully that won't destroy our landscaping too badly, compared to trenches.

It wasn't particularly easy to find good installers here in Colorado (one HVAC salesperson was planning to bring a driller in from FLORIDA for the ground loop), but we should break ground on the vertical wells in April. One hang-up is that we're going to have to upgrade our electrical utility connection from the measly 150 amps we have now to a 400 amps service. Good new is, that will allow us to fully electrify and get off natural gas entirely, as well as shift over from gasoline to electric vehicles. 


Wednesday, December 4, 2019

Electric Hatchback

We bought our first electric car!


It's a 2015 Ford Focus Electric. We will be charging it off the old electric clothes dryer circuit.

Sunday, October 9, 2016

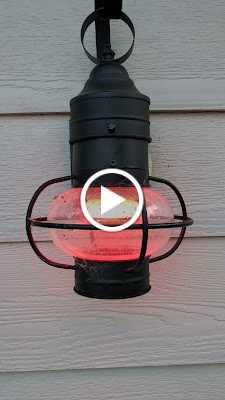
Outdoor Smart Lights

I picked up a couple of LIFX color 1000 smart bulbs last week when they went on sale. I've been wanting to put smart bulbs in the two light fixtures bracketing the garage for a while now.

LIFX bulbs are brighter, have better color reproduction (and better whites), and are more responsive than any other smart RGB bulb I'm aware of today. However, they are are also pretty large:


The light fixtures I wanted to put these bulbs in were designed for a standard A19 bulb, and the LIFX bulbs just did not fit well. So I made 1.75" strips from scrap sheet metal, spray-painted them flat black, and dropped the light fixture down to fit the new bulbs:


It's not professional grade, but I don't think anyone will notice the extra metal strip unless they are specifically looking for it.

I did change the wiring for these lights. They used to be on a dimmer switch with the front porch light. These smart bulbs are not supposed to be on a dimmer, but beyond that, I didn't want these smart bulbs to be on a switch that we use regularly. A smart bulb on a switched power supply becomes awfully dumb when the power is off.

I came up with the following solution:


The wire coming out of the light fixture now ends in a male electrical plug. The wire coming from the front porch dimmer switch now terminates in a standard electrical outlet, top left (I need to put a label on it). A standard, always-on outlet already existed (bottom right) from a previous project. Currently, the smart bulbs are plugged into the always-on outlet, but I can easily put dumb bulbs into the light fixtures and plug them back into the dimmer switch if I ever want to.

For Halloween, I have the new bulbs on a flickering orange:


In the future, we should also be able to indicate on which side of the driveway we would prefer guests to park, maybe with a blinking green light on the appropriate side.

Sunday, October 2, 2016

Larger Tortoise Terrarium

Tammy the Tortoise spent the Spring and Summer gorging on our well-watered grass this year, and grew too big for our current terrarium:


Getting a new glass terrarium is prohibitively expensive. We decided to build a new one from scrap wood.

Brianna and I talked over some design ideas, and then Brianna took the lead on the build, doing all the measuring and cutting, with me supporting her. We did most of it in one afternoon while Lincoln napped.


There's a 25W silicone-pad heater under the left end of the plastic liner. A spare desk lamp is repurposed with a incandescent heat bulb, and the white fluorescent fixture is a special UV lamp to Tammy gets the desert-like radiation needed for a healthy shell.

The lights and heater are controlled by a Quirky Pivot Power Genius power strip, which has two smart outlets. These outlets are on a pre-programmed schedule (but also have voice and smartphone control), and I added an LED indicator light to show when the heating pad is on.


Eventually I would like to have some sort of presence sensor, so the terrarium shuts down when Tammy is out in the yard. I haven't nailed down how I want to do that yet, though.

Friday, March 25, 2016

Dining Room Light

Brianna likes as much light as possible, and our Great Room is a kinda dim relative to the rest of the house. So I updated the dining room light fixture from three bulbs to four.


Now the light fixture is like a shielded ball of plasma, with four LED bulbs throwing off 3200 lumens inside the central enclosure.


Saturday, March 12, 2016

Smart Terrarium

I picked up a Quirky smart powerstrip for $21 earlier this week, to replace the buzzing mechanical timers we had on the lights and heater on the terrarium.

Quirky has gone bankrupt and this product is no longer supported, but it still works right now, and it looks like I'll be able to control it from OpenHAB if the official app goes away.

No more buzzing in the family room!

Sunday, February 14, 2016

Basement Smart Switches

This is kinda a place-holder post. There is a lot more work that went into these switches, but I only have time for a quick write up:

I put the basement lights on smart switches, which involve reworking the existing wiring a bit:


I also got a dumb motion-sensing switch in the laundry room.


It's really nice to walk into the laundry room with a full load of clothes and just have the light turn on automatically, without having to fumble for the switch. The light turns on almost as soon as something (including the door itself, which opens into the laundry room) breaks the plane of the doorway.

This switch is somewhat remarkable, as it does not require a neutral wire. Apparently Lutron holds a patent on the technology. It will be really nice for DIY home automation smart switches when that patent expires.

Monday, January 18, 2016

Power Monitoring and Solar

I've been wanting to monitor our use of electricity as part of the smart house project. I actually got started last spring by installing a current meter, but I never got the software working.

When we got the solar panels installed, the electrician removed my current meter in the process of upgrading the circuit breaker panel.

Last weekend, I installed TWO current meters: one on the mains, to measure current coming into and out of the house, and one on the solar panel lines, to measure current generated by the solar panels.


As it turns out, the OpenHAB has been updated to easily add my model of current meter to the system, so it was pretty easy (this time) to see and log the data. Here's the first day:


I knew we were using about 900 kWh per month from our electric bill, but it's kinda shocking to see the instantaneous numbers. It's also pretty interesting to see how many cyclical loads we have, and what a mess the solar power looks like.

Those big spikes on both Mains legs must be the hot tub - there's nothing else on our breaker panel rated to take that much energy.

I'll be rotating some smart plugs with their own energy tracking through the house over the next couple weeks, trying to nail down exactly what those other cyclical loads are. Primary suspects are the fridge, chest freezer, furnace blower, and electric heater.

I also want to accurately measure how much electricity the house is using, which seems difficult with the erratic solar input. It turns out current sensors like mine can't distinguish which direction the power is flowing, so I need to figure out another method.

It seems to me that consumption = |mains - solar|, and that when (mains - solar) is negative (i.e. when solar is greater than mains), the value shown on the mains is pure surplus being sent to the grid. Is there anything wrong with that thought process?

EDIT: So here's a scenario where the above idea wouldn't work: If the house is consuming 300 watts total, and 200 comes from solar and 100 comes from the mains, the 100 from the mains is consumption, not production, even though solar > mains.

Frustrating. Seems like I'll have to find a way to talk to the electric meter to do this calculation reliably.

Sunday, January 17, 2016

Garage Electrical and Lighting

I saw a deal on an LED strip and decided to add some additional light to our garage, so we could see into our trunks better.


If I were to do this again, I'd probably snap a chalk line as a guide - the LED strip kinda undulates as it is.

I had to add an outlet for this light (and re-purposed a Zwave plug) to power the LED strip. In the process, I definitively verified that the seller was lying about having a 240 volt circuit in the garage - the little sub-panel he installed in the garage is single-phase only, and the supply wiring is only rated for 15 amps! Fortunately, the washer and dryer back up against the garage, and since we switched over to a natural gas dryer, there is an unused 240 volt circuit nearby - the dream of having a high-capacity electric car charger is still alive!

The outlets in the garage all tested as having the hots and neutrals swapped, so I replaced the outlets with tamper-resistant outlets and fixed the hot/neutral issue. When I had everything buttoned up, I tested again and discovered the entire garage isn't grounded properly! Ugh. I'll have to fix that when I have more time.


Saturday, October 31, 2015

Second Exterior Garage Light

I added a second exterior light to the garage door. This one has been on my list for a loooong time. Finally got it done for Halloween.

Here's how it looked yesterday:


I tied into the existing light fixture for power. I added wire across the top of the garage door, boring holes through the joists so I can finish these walls later. I made the holes big enough to run that other wire through later.


I cut a hole through the wall, and put in an old-work light box.


And then I installed the light fixture! In the process I dropped a bolt and spent 10 minutes searching for it.


And now it's completed! We have orange bulbs in there for Halloween :-)


Sunday, October 25, 2015

Master Bedroom Electrical

Whenever Brianna is out of the house for a day or two, I take the opportunity to knock a couple items off my Electrical To-Do list (yes, I have an actual list).

This weekend, I replaced the GFCI in the master bathroom:


I also added a new outlet inside the bathroom vanity. I cut a hole hole in the cabinet and drywall to the right of the sink, and ran a cable up to tie into the GFCI above. Then I installed a junction box in the wall, and ran flexible conduit over to the left side of the cabinet for the actual outlet.


The hole under the outlet leads to the drawer where Brianna keeps her hair dryer and curling iron. I'm  going to run a power strip through that hole so the appliances can stay plugged in. And hopefully there will be less cords running all over the countertop.

I also installed a motion-sensing switch in the master closet. The light turns on as soon as you break the plane of the doorway, and stays on for two minutes after it last senses motion (the timer is adjustable).


Incidentally, that's the last switch (and the GFCI was the last outlet) to be replaced in the above-ground portion of the house. Every smoke-stained switch and outlet has been replaced with shiny new white versions (and a lot of them are smart!).

Saturday, October 3, 2015

Back Porch Light Fixture

I had a coupon for Lowes, so I picked up a light fixture a while ago. Today I installed it.


Now it matches the light fixtures on the front of the house.

I painted the vent for the range hood, per HOA guidelines. I think it looked better before, but it is less noticeable now.


I also did some painting touch-up in that general area after I touched up some paint around the solar equipment. And with that wrapped up, I put the paint back inside the house for the winter.

Saturday, September 26, 2015

MOAR Smart Swithes

I installed five new smart switches on three circuits (two circuits were three-way lights, with two switches controlling one circuit). It was supposed to be four circuits, but one of the switches I bought was non-functional out of the box - I'll be returning that switch.

One of the circuits was the basement stairwell. The switch at the top of the stairs was uncomfortably close to the doorway:


So I yanked out the old junction box, and replaced it with a two gang box. It's much more comfortable to use now.


Incidentally, that's what a "smart toggle" switch looks like. Flick up for "on", flick down for "off", press and hold in either direction to control the dimming. I thought photos of it looked pretty ugly (and I still kinda think it looks ugly) but I really really like how well it works. If this style of switch had been available to purchase earlier, more of the house might be using this model.

For the record, the other two circuits that got smart switches are the main floor hallway and the garage. The upstairs office was supposed to get a smart switch, but I put a dumb switch back in when I couldn't get the switch to actually operate.

Wednesday, September 16, 2015

150-Watt-Equivalent LED in a Single-Socket Light Fixture

The light fixture we put in our dining room only has a socket for a single bulb, and is only rated for 60 watts. We compensated by putting in a 150-watt-equivalent CFL.


That's the 150-watt-equivalent on the left (consumes 40 watts) and a 60-watt equivalent on the right (13 watts).

Unfortunately, this CFL had a long warm-up period and was not dim-able (and I couldn't find any 150-watt-equivalent, dim-able CFLs). I was ready to automate this switch, so I needed to replace the bulb. Unfortunately, I couldn't find any 150-watt-equivalent LEDs, let alone dim-able LEDs. I had to hack together my own solution.

It took forever, but I eventually found a three-socket fixture on amazon. 

Satco 90-463

I took it apart, spray-painted it silver instead of black, and rewired it. 


Today I installed it with three 60-watt-equivalent LED bulbs:


And here's how it looks now with 2400 lumens, on its own smart dimmer, and included in OpenHAB:


As a side note: it turns out I'm bad at designing experiments. After rewiring the three-socket adapter the first time, I tested it in a socket in the basement. It didn't work. I tore it apart twice trying to figure out what I had wired wrong. I eventually realized my wiring job was fine: the socket I was testing it on had a thick lip that didn't matter with a bulb, but was preventing my socket adapter from screwing in all the way and making good electrical contact. I literally could have had this project done two months ago if I had tested with a different socket.

Electrical Work and Two New Smart Switches

This is mostly a note to myself.

While Link was down for his naps today, I turned off the electricity to do some investigations and upgrade some switches.

In the morning, I flipped the switch for the piano pendant light right side up and replaced the wiggling, stained switch in the laundry room.

I figured out the 3-way light switches in the basement stairwell (remote switch at top of stairs) and main floor hallway (remote switch in the three-gang box <-that surprised me).

I checked out the basement light switches. Like the basement bedroom, they do not have a neutral in the box. The switches just interrupt the hot wire. This makes some sense, as the basement lights are on the same electrical circuit as the kitchen, which is directly above the basement lights. Unfortunately, this means I can't use any of the smart switches I'm familiar with to control these lights.

Bummer.

During the afternoon nap, I worked in the master bedroom, replacing the original switch for the shower light with a new, non-grody switch, replaced a beat-up outlet that used to be switched, and installed a smart switch for the ceiling fan.

Note to self: the ceiling fan fixture appears to have separate wire runs for the motor and the lights, even though the current fixture does not have any lights.

I also installed a smart switch for the dining room light.

Once Link was asleep for the night, I got things updated in OpenHAB and added the new lights to Alexa.

Sunday, September 13, 2015

Three Smart Switches and a Flashlight

Brianna's gone on a business trip, so I'm free to modify the house's electrical switches!

Today I worked on the Kitchen: there were two light fixtures (by the sink and by the kitchen table) that hadn't been automated yet, and one of those switches shared a junction box with the switch for the back deck light:


I didn't just want to replace the switches, though: I wanted to add an outlet. So I did, cause no one was around to stop me.


I've floated this idea to a couple people, but no one has sympathized with my desire to add the outlet. However, I feel confident that none of them have had a pregnant wife request they find a pet tortoise hidden somewhere in the backyard after dark and with snow starting to fall.


Now I'll have a flashlight ready to go on my way out the door!

When Lincoln is down for the night, I'll work on getting these three switches integrated with the rest of the smart house system.

What did I do with Lincoln while I was installing the physical switches? I gave him a cracker and told him to play quietly by himself:


He spent a good chunk of the afternoon bumping into my shins while I worked.